Getting a ruler tattooed on my hand and forearm
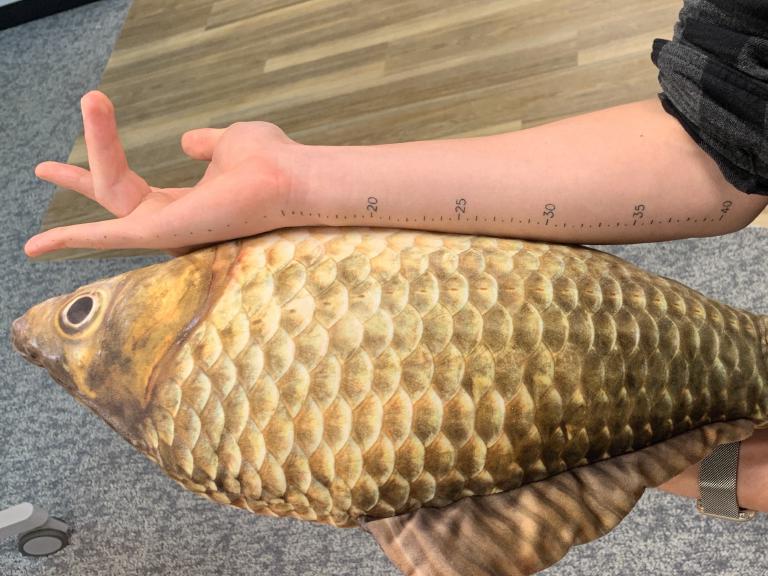
I don’t like carrying rulers around all the time so I decided to get one as a tattoo. A more whimsically profound reason would be that this tattoo is a daily reminder to more carefully “measure” the consequences of my actions -such as the consequences of getting the ruler permanently inked onto my fingers.
Rulers are straight and rigid but my skin is inconveniently curved and elastic. To still attain some degree of accuracy I
- performed skin stretch tests to determine the optimal position of the tattoo
- 3D-scanned my forearm to create a stencil that adjusts for its curvature
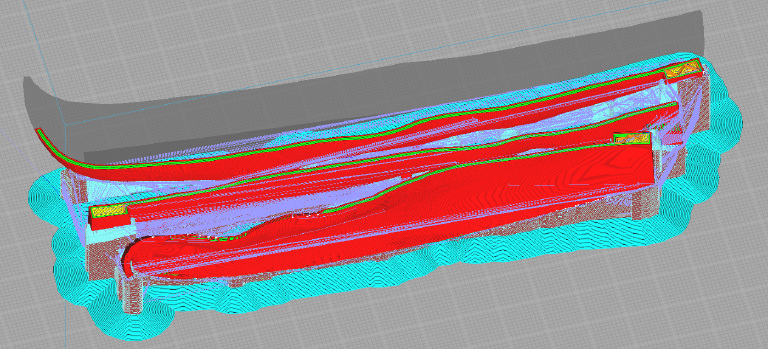
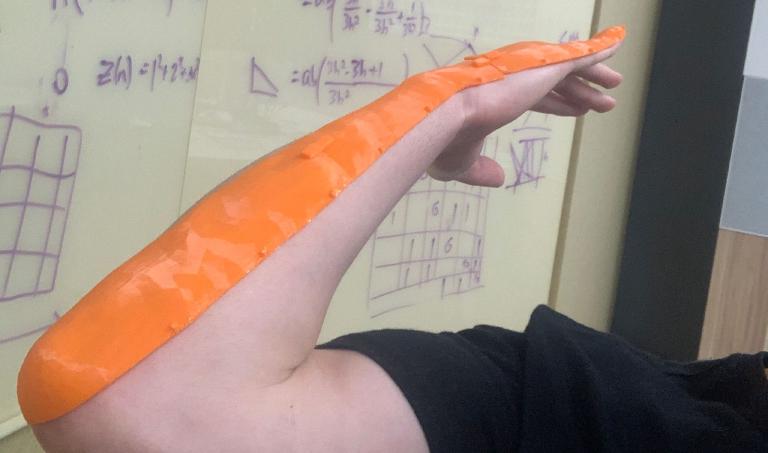
- 3D-printed a template that fits snugly around my arm to aid in applying the stencil
Maximizing accuracy by minimizing skin-stretch
The skin around my elbow stretches and contracts as I bend my arm. To determine the resulting measurement error, I angled my arm at a 90-degree angle and applied 1.0 cm marks at three positions on my forearm (inside, side, and back). After extending the arm again, I measured these marks to observe any changes in length.
I recorded significant stretching and contraction on the inside and back, but measurements on the side remained consistent, staying within an acceptable 1 cm threshold. Additionally, the skin on the side is exposed less to the sun, reducing tattoo fading. Surprisingly, this is not a popular spot for ruler tattoos. For example, Adam Savage chose the inner forearm, where the skin stretches most.
I just got my first tattoo! Story and more photos on @imgur: https://t.co/7n3AQ0ITfm pic.twitter.com/Vg5m5L9uWg
— Adam Savage (@donttrythis) January 13, 2019
Adjusting for the curvature of my forearm
I want to use the tattoo to measure straight lines but the surface of my arm is curved. Without adjusting the stencil for this curvature, the measurements may exhibit a positive bias.
Creating a 3D model from photographs
To accurately project the straight ruler marks onto the curved surface of my arm, I created a 3D model of it using photogrammetry which required taking over a hundred overlapping pictures of my arm from different perspectives. While using my phone’s Lidar sensor would have been less tedious, it lacks the resolution required to capture the fine detail of fingers.
Using algorithms like SIFT (Scale-invariant feature transform), thousands of common points/features are identified in the photographs. Since the pixel coordinates of these features are fully determined by the 3D location of that feature in space, the position of the camera, and the distortion caused by the camera’s lens, the mathematical relationship between a features’s 3D position \((x, y, z)\) and its pixel coordinates \((p_x, p_y)\) can be represented as follows
\[ \begin{bmatrix} p_x \\ p_y \end{bmatrix} = K (R \begin{bmatrix} x \\ y \\ z \end{bmatrix} + \mathbf{t}) \]
Here, \(R\) and \(\mathbf{t}\) are the rotation matrix and translation vector which capture the camera’s rotation and position around the object. \(K\) is the camera’s intrinsic matrix which is determined by its focal lengths, optical centers, and skew coefficient. In the triangulation step, the goal is to fine-tune \( R \), \(\mathbf{t}\), and \((x, y, z)\) to faithfully reconstruct \((p_x, p_y)\). Finally, neighboring feature vertices are connected by edges and triangular faces to form the object’s surface mesh.
I used Polycam to create the model. Alternatively, you could use Meshroom which is open-source but requires a GPU to get good results.
Creating a curvature-adjusted stencil

The red line in the above image represents the path I chose for the ruler to follow. I tried avoiding skin folds and the inner hand where tattoo ink tends to fade prematurely. Using CAD software, I orthographically projected this path onto the surface of my arm.
Intuitively, this projection can be thought of as drawing lines passing from my eye through any of the points on the path and determining if/where they intersect the triangles composing my arm’s surface mesh. Essentially this problem is equivalent to finding the point \(P\) at which a line in \(\mathbb{R}^3\) passing through two points \( (L_1, L_2)\) intersects the triangle in \(\mathbb{R}^3\) defined by three vertices \( (F_1, F_2, F_3)\).
Every point within the triangle can be expressed as an interpolation among the vertices, initially between \(F1\) and \(F2\), and subsequently with \(F3\) as follows
\[ F_i = F_3 + \beta_i(F1 + \alpha_i(F_2 - F_1) - F_3) \]
Similarly, any point on the line passing through \(L_1\) and \(L2\) can be expressed using the interpolation
\[ L_i = L_1 + \gamma_i (L_2 - L_1) \]
By equating \(L_i\) to \(F_i\) and solving for \(\alpha_i\), \(\beta_i\), and \(\gamma_i\) via Gaussian elimination, you can determine the intersection, \(P\), of the line with the plane containing the triangle. This point lies within the triangle iff \(\alpha_i\) and \(\beta_i\) fall between 0 to 1.
The projected path creates a series of connected vertices (a.k.a. spline) on the 3D mesh. From there it’s trivial to determine the spacing between the ruler marking that’s required to adjust for the curvature. I used the “reportlab” Python package to draw the lines and distance annotations and save the stencil as a PDF.
3D printing a stencil application template
Having invested significant effort in designing the ideal stencil, it was imperative to guarantee its precise application. To streamline this process, I developed 3D-printed templates designed to snugly fit over my hand and forearm. Their edge delineated the intended path for the stencil with small arrows marking the placement of the ruler markings. This template turned out to be pretty useful as it enabled my tattoo artist to effortlessly trace its edge as a guide, ensuring the stencil was applied with precision.


The completed tattoo


Here are some additional factors I considered:
- Color: I decided to go with solid black as it is known for being long-lasting and safe. In 2022, the EU banned thousands of pigments deemed unsafe which virtually outlawed colored tattoos. Soot-based blacks are considered safe even by EU standards.
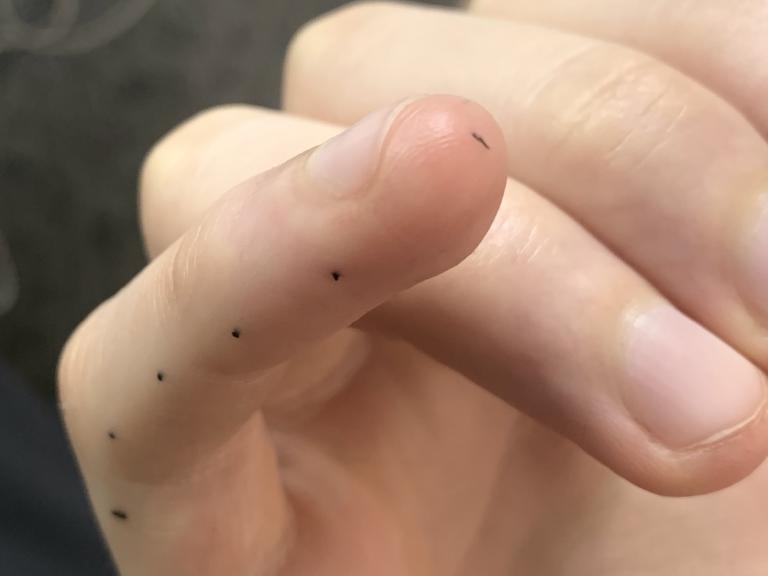
- Ruler precision: Tattoos will fade over time. Therefore, I chose to space the ruler markings 5mm apart to prolong their clarity. To achieve sub-5mm precision, I varied the lengths of the ruler markings ranging from 1mm to 4mm.
- Tattoo artist: I compared around 20 Sydney-based tattoo artists specializing in fine line art and ultimately decided to go with Tori Li. The quality of her line work -especially when healed- stood out to me.